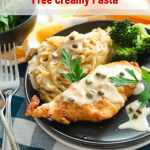
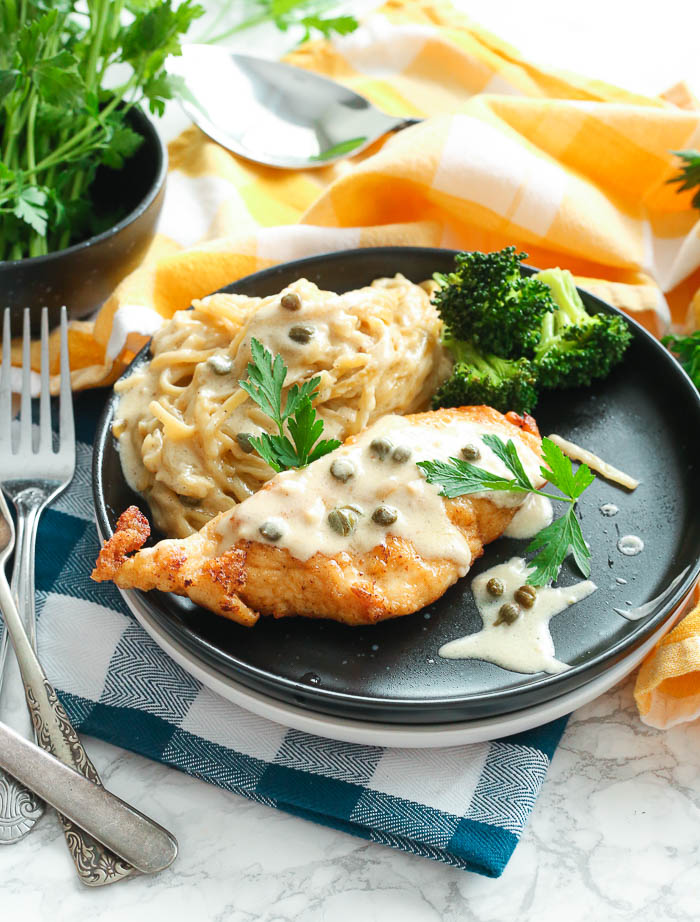
This 30-minute Instant-Pot Chicken Piccata with perfectly savory creamy pasta and sauce can be on your table this evening! Creamy, savory, buttery sauce is thickened while being swirled around al dente pasta and is topped with golden-crusted chicken breast pieces.
This recipe uses simple ingredients and is made entirely in your pressure cooker - quick and no mess!
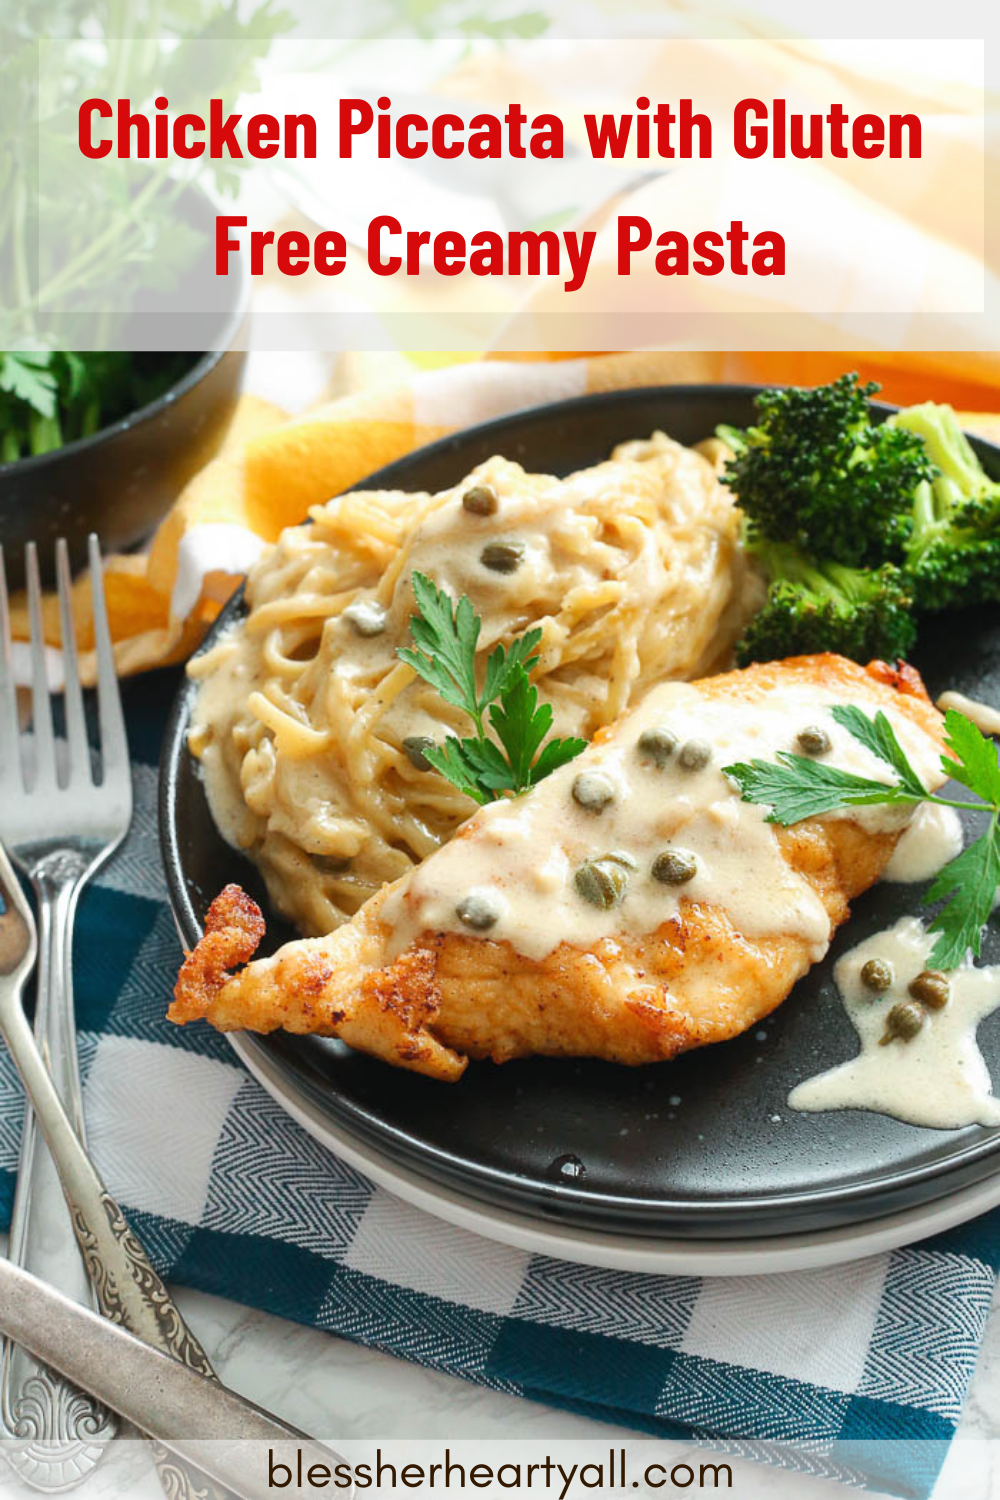
Table of Contents
Insanely Easy Pressure Cooker Chicken Piccata:
This IS insanely easy (and delicious and GLUTEN-FREE!!!) Instant Pot chicken piccata with the most decadently creamy, savory, with-a-splash-of-lemon cream sauce!
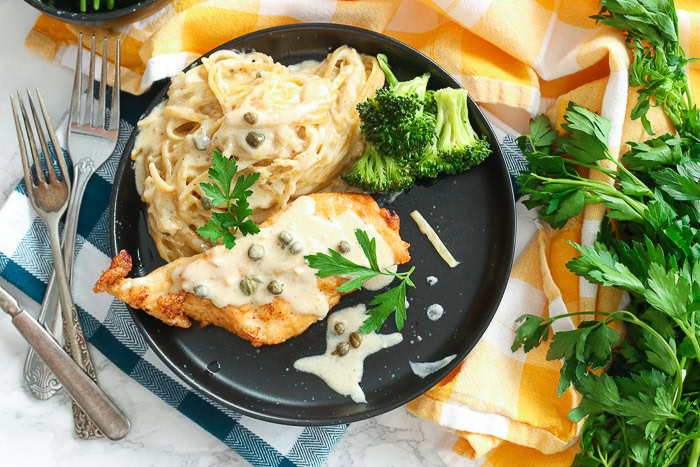
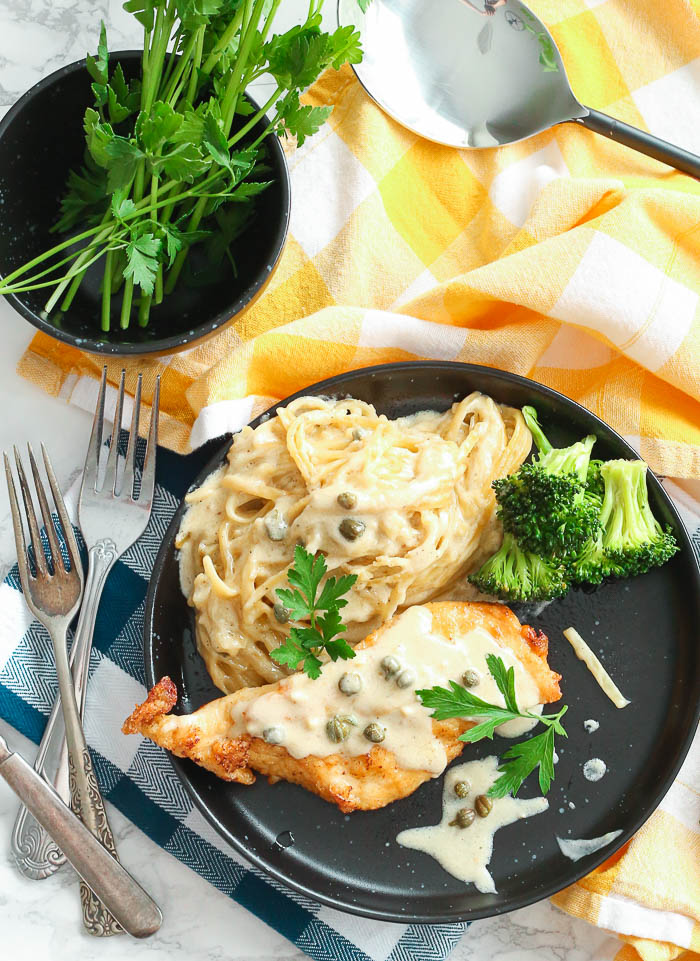
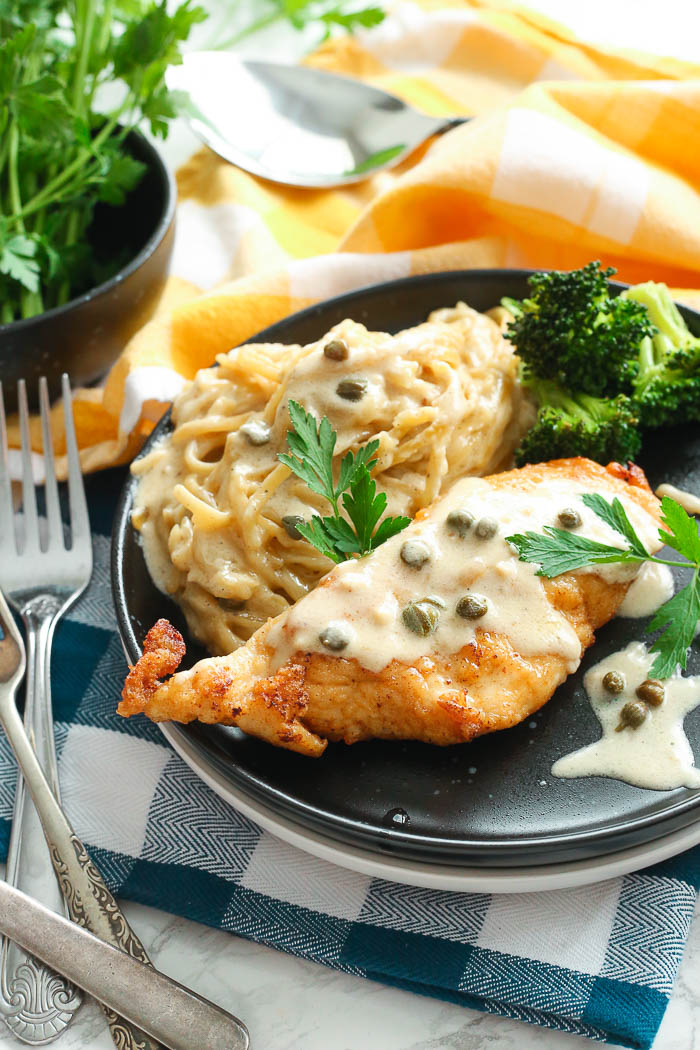
It takes me 30 minutes from start to finish to make this dish - everything you see on that black plate - well except the broccoli - that was steamed in the microwave - but you get what I mean - the golden, breaded-to-perfection chicken breasts, the al dente pasta, and that thick creamy piccata sauce - all made in my pressure cooker, all in 30 weeknight minutes.
This recipe was a big hit last night over on Instagram.
I had promised a bunch of people that I'd get the recipe I was making in real-time over to them on the gram- but it got to be too many people needing it.
So I decided to hurry my butt up and get the recipe post posted as soon as I could today so that EVERYONE can indulge!

Simple Ingredients To Use:
- butter
- 2 large chicken breasts, cut in half lengthwise so that they become two thinner pieces
- flour
- grated parmesan cheese
- garlic powder
- salt
- minced garlic
- chicken broth (or stock)
- heavy cream
- capers
- lemon juice
- spaghetti or linguine pasta, broken in half
What Are Capers:
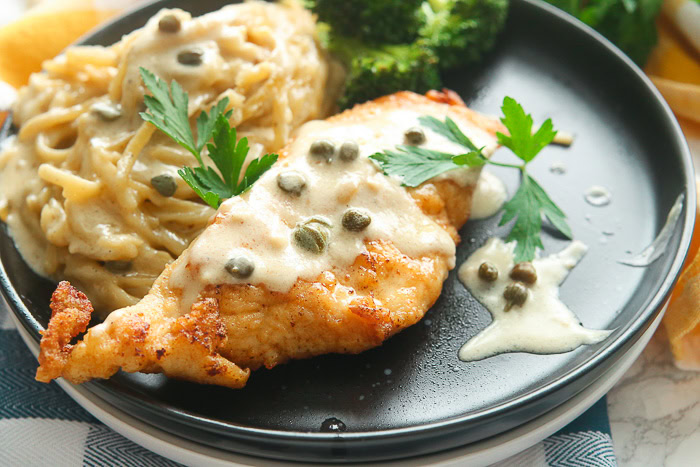
Notice those weird little green balls in the creamy sauce??? Those are capers.
Capers are edible little flower buds.
They can be a touch sweet, tend to be quite salty, and brined to bring out an amazing splash of tartness!
They usually come packaged in little glass containers and can be commonly found in the grocery store aisle beside pickles and other pickled and jarred food products. You may also order them here.
Making This Dish 100% Gluten-Free:
This post may contain affiliate links.
To make this recipe 100% gluten-free - one must use all gluten-free ingredients.
The ingredients that are of most concern is the flour and the pasta noodles - the other ingredients will be easier to find gluten-free.
I like to use Bob Red Mill's Baking Flour Blend for this recipe and for the pasta, I tend to go for Ancient Harvest's Gluten-Free Linguine noodles!
They rock - they aren't mushy once cooked and they have the texture and consistency of regular pastas!
Easy Instructions:
- Set your pressure cooker to the saute or sear function and drop in the butter and allow to melt. While the butter is melting, add the flour, 4 Tablespoons parmesan cheese, garlic powder, and salt together on a large plate and stir until well mixed.
- Drop each chicken breast half in the flour mixture, allowing all sides to be lightly coated in the flour mix. Drop 2-4 of the chicken pieces (depending on how big your chicken and your pressure cooker is) into the melted butter and allow to cook and brown for 4-5 minutes on the first side, until there is a nice golden brown crust.
- Then flip each breast over to the second side and allowing to cook for another 4-5 minutes or until the internal temperature reaches 165*F. Remove the chicken pieces, put on a plate, and keep in a place to stay warm (microwave or oven perhaps).
- Add the minced garlic to the melted butter that is still in the bottom of the Instant Pot and allow to saute for 1-2 minutes, until fragrant and starting to turn golden brown. Then, add the chicken broth, heavy cream, capers, and lemon juice, giving it all a good stir to incorporate the ingredients. Add the pasta to the bottom of the pressure cooker, making sure that liquid covers all of the pasta to ensure that pasta is cooked evenly.
- Close the pressure cooker, making sure that it is sealed and not vented. Set your pressure to cook pasta or whole grains. Cook time will vary depending on the pasta you are using - If using regular pasta: take the time on the package instructions and divide by two - that is the time you will use on your Instant Pot. If using gluten-free pasta: take the time on the package instructions and divide by two, then subtract an additional 1-2 minutes, depending on how al dente or tender you like your noodles.
- After the time is up, manually release the pressure from the pressure cooker, then carefully open the lid after pressure has been exhausted. Give your pasta and sauce and quick stir and plate your pasta. Take your cooked chicken breasts from the warm location and place on top of the pasta. Drizzle a spoonful of extra sauce overtop the chicken and enjoy while warm and steaming!
Recipe Pro Tips:
To make this take as little time as possible, I start my butter melting while gathering my other ingredients and preparing the plate of the four mixture.
That way, when you are ready with your coated chicken, your butter will be all melted and ready for it's savory adventure!
What Pressure Cooker To Use?
I have two favorite pressure cookers: My first is my Instant Pot – love that guy!
My second one is my Pampered Chef Quick Cooker – Man is this thing worth the money!
You’d be perfectly happy and content with either pressure cooker option here.
Recipe Pairings:
Well, this recipe is both the breaded chicken along with the creamy pasta and the thick, savory sauce.
So, chances are, you won't need a whole lot to lay beside this main player on your dinner plate.
Our family likes to partner some fresh steamed broccoli, Air Fried Asparagus, Summer Tomato + Zucchini Bake, or Sriracha Cream Broccoli alongside this chicken piccata dish.
Are There Alternatives To The Pasta?
You can definitely make this recipe without the pasta.
Many people like to pair their chicken piccata with other options such as Jasmine Rice or Basmati Rice.
Others like to use a bed of steamed cauliflower or broccoli.
And others like to plate this chicken dish with zoodles (zucchini noodles) or roasted spaghetti squash.
The possibilities are endless.
How to Make Without Pasta?
Now, if you are going to substitute the pasta noodles with something else, you must still create and cook the sauce - you just won't be putting any noodles into the Instant Pot and closing it up to cook.
Instead, once you have cooked your chicken, sauteed your garlic, and added the other liquid ingredients into your pressure cooker to start making the sauce, you will keep the pressure cooker on saute mode - allowing the creamy sauce to simmer, reduce, and thicken, uncovered.
This will likely take 10-15 minutes to accomplish, and I would suggest stirring the pot every once in a while to check on progress of the sauce thickening.
Then once thick and reduced, pour the piccata sauce over the cooked chicken and whatever side you decided to swap the noodles out for.
And bingo - you're ready to eat!
Storing Leftovers:
Make sure that your chicken piccata situation has cooled down to room temperature before attempting to store this deliciousness.
Once cooled to room temperature, place the pasta and sauce, and the breaded chicken into SEPERATE food-safe airtight storage containers and place them in the fridge for up to 3 days before reheating and enjoying for a second round.
Other Yummy Instant Pot Recipes w/ Chicken:
Rosemary Goat Cheese Chicken Pasta
Instant Pot Chicken Fried Rice
7-Ingredient Instant Pot Chicken Spaghetti
Easy Instant Pot Chicken Fajitas

If you make my Instant Pot Chicken Piccata, let me know in the comments! Enjoy enjoy enjoy!
Also- be sure to follow me on Instagram and hashtag #BlessHerHeartYall or tag @BlessHerHeartYall – I love seeing and hearing the delicious things you make!
If you love this Pressure Cooker Chicken Piccata Pasta recipe, be sure to follow me on social media so you never miss a mouth-watering post:
| FACEBOOK | TWITTER | PINTEREST | INSTAGRAM |
Instant Pot Chicken Piccata with Creamy Pasta
This 30-minute Instant-Pot Chicken Piccata with perfectly savory creamy pasta and sauce can be on your table this evening! Creamy, savory, buttery sauce is thickened while being swirled around al dente pasta and is topped with golden-crusted chicken breast pieces.
Ingredients
- 4-5 Tablespoons butter
- 2 large chicken breasts, cut in half lengthwise so that they become two thinner pieces
- 2 Tablespoons flour
- 4 Tablespoons grated parmesan cheese + ½ cup grated parmesan cheese
- ½ teaspoon garlic powder
- ½ teaspoon salt
- 2 Tablespoons minced garlic
- 1 ¾ cup chicken broth (or stock)
- 1 ¼ cup heavy cream
- 3 Tablespoons capers
- 3 Tablespoons lemon juice
- 8 ounces of spaghetti or linguine pasta, broken in half
Instructions
- Set your pressure cooker to the saute or sear function and drop in the butter and allow to melt. While the butter is melting, add the flour, 4 Tablespoons parmesan cheese, garlic powder, and salt together on a large plate and stir until well mixed.
- Drop each chicken breast half in the flour mixture, allowing all sides to be lightly coated in the flour mix. Drop 2-4 of the chicken pieces (depending on how big your chicken and your pressure cooker is) into the melted butter and allow to cook and brown for 4-5 minutes on the first side, until there is a nice golden brown crust. Then flip each breast over to the second side and allowing to cook for another 4-5 minutes or until the internal temperature reaches 165*F. Remove the chicken pieces, put on a plate, and keep in a place to stay warm (microwave or oven perhaps).
- Add the minced garlic to the melted butter that is still in the bottom of the Instant Pot and allow to saute for 1-2 minutes, until fragrant and starting to turn golden brown. Then, add the chicken broth, heavy cream, capers, and lemon juice, giving it all a good stir to incorporate the ingredients. Add the pasta to the bottom of the pressure cooker, making sure that liquid covers all of the pasta to ensure that pasta is cooked evenly.
- Close the pressure cooker, making sure that it is sealed and not vented. Set your pressure to cook pasta or whole grains. Cook time will vary depending on the pasta you are using - If using regular pasta: take the time on the package instructions and divide by two - that is the time you will use on your Instant Pot. If using gluten-free pasta: take the time on the package instructions and divide by two, then subtract an additional 1-2 minutes, depending on how al dente or tender you like your noodles.
- After the time is up, manually release the pressure from the pressure cooker, then carefully open the lid after pressure has been exhausted. Give your pasta and sauce and quick stir and plate your pasta. Take your cooked chicken breasts from the warm location and place on top of the pasta. Drizzle a spoonful of extra sauce overtop the chicken and enjoy while warm and steaming!
Notes
Cook time will vary depending on the pasta you are using - If using regular pasta: take the time on the package instructions and divide by two - that is the time you will use on your Instant Pot. If using gluten-free pasta: take the time on the package instructions and divide by two, then subtract an additional 1-2 minutes, depending on how al dente or tender you like your noodles.
delicious recipes.
I love chicken picatta! This recipe looks so easy, I can't wait to try it.